

AWS Lambda (Node)
Setting up a Lambda
The AWS CDK is the most convenient way to create a new project on AWS Lambda. For example, it lets you directly define integrations such as APIGateway, a tool to make our lambda publicly available as an API, in your code.
mkdir my-appcd my-appcdk init app -l typescriptnpm i esbuild @upstash/qstashmkdir lambdatouch lambda/index.tsWebhook verification
Using the SDK (recommended)
Edit lambda/index.ts, the file containing our core lambda logic:
import { Receiver } from "@upstash/qstash"import type { APIGatewayProxyEvent, APIGatewayProxyResult } from "aws-lambda"const receiver = new Receiver({ currentSigningKey: process.env.QSTASH_CURRENT_SIGNING_KEY ?? "", nextSigningKey: process.env.QSTASH_NEXT_SIGNING_KEY ?? "",})export const handler = async ( event: APIGatewayProxyEvent): Promise<APIGatewayProxyResult> => { const signature = event.headers["upstash-signature"] const lambdaFunctionUrl = `https://${event.requestContext.domainName}` if (!signature) { return { statusCode: 401, body: JSON.stringify({ message: "Missing signature" }), } } try { await receiver.verify({ signature: signature, body: event.body ?? "", url: lambdaFunctionUrl, }) } catch (err) { return { statusCode: 401, body: JSON.stringify({ message: "Invalid signature" }), } } // Request is valid, perform business logic return { statusCode: 200, body: JSON.stringify({ message: "Request processed successfully" }), }}We'll set the QSTASH_CURRENT_SIGNING_KEY and QSTASH_NEXT_SIGNING_KEY environment variables together when deploying our Lambda.
Manual Verification
In this section, we'll manually verify our incoming QStash requests without additional packages. Also see our manual verification example.
- Implement the handler function
import type { APIGatewayEvent, APIGatewayProxyResult } from "aws-lambda"import { createHash, createHmac } from "node:crypto"export const handler = async ( event: APIGatewayEvent,): Promise<APIGatewayProxyResult> => { const signature = event.headers["upstash-signature"] ?? "" const currentSigningKey = process.env.QSTASH_CURRENT_SIGNING_KEY ?? "" const nextSigningKey = process.env.QSTASH_NEXT_SIGNING_KEY ?? "" const url = `https://${event.requestContext.domainName}` try { // Try to verify the signature with the current signing key and if that fails, try the next signing key // This allows you to roll your signing keys once without downtime await verify(signature, currentSigningKey, event.body, url).catch((err) => { console.error( `Failed to verify signature with current signing key: ${err}` ) return verify(signature, nextSigningKey, event.body, url) }) } catch (err) { const message = err instanceof Error ? err.toString() : err return { statusCode: 400, body: JSON.stringify({ error: message }), } } // Add your business logic here return { statusCode: 200, body: JSON.stringify({ message: "Request processed successfully" }), }}- Implement the
verifyfunction:
/** * @param jwt - The content of the `upstash-signature` header (JWT) * @param signingKey - The signing key to use to verify the signature (Get it from Upstash Console) * @param body - The raw body of the request * @param url - The public URL of the lambda function */async function verify( jwt: string, signingKey: string, body: string | null, url: string): Promise<void> { const split = jwt.split(".") if (split.length != 3) { throw new Error("Invalid JWT") } const [header, payload, signature] = split if ( signature != createHmac("sha256", signingKey) .update(`${header}.${payload}`) .digest("base64url") ) { throw new Error("Invalid JWT signature") } // JWT is verified, start looking at payload claims const p: { sub: string iss: string exp: number nbf: number body: string } = JSON.parse(Buffer.from(payload, "base64url").toString()) if (p.iss !== "Upstash") { throw new Error(`invalid issuer: ${p.iss}, expected "Upstash"`) } if (p.sub !== url) { throw new Error(`invalid subject: ${p.sub}, expected "${url}"`) } const now = Math.floor(Date.now() / 1000) if (now > p.exp) { throw new Error("token has expired") } if (now < p.nbf) { throw new Error("token is not yet valid") } if (body != null) { if ( p.body.replace(/=+$/, "") != createHash("sha256").update(body).digest("base64url") ) { throw new Error("body hash does not match") } }}You can find the complete example here.
Deploying a Lambda
Using the AWS CDK (recommended)
Because we used the AWS CDK to initialize our project, deployment is straightforward. Edit the lib/<your-stack-name>.ts file the CDK created when bootstrapping the project. For example, if our lambda webhook does video processing, it could look like this:
import * as cdk from "aws-cdk-lib";import * as lambda from "aws-cdk-lib/aws-lambda";import { NodejsFunction } from "aws-cdk-lib/aws-lambda-nodejs";import { Construct } from "constructs";import path from "path";import * as apigateway from 'aws-cdk-lib/aws-apigateway';export class VideoProcessingStack extends cdk.Stack { constructor(scope: Construct, id: string, props?: cdk.StackProps) { super(scope, id, props) // Create the Lambda function const videoProcessingLambda = new NodejsFunction(this, 'VideoProcessingLambda', { runtime: lambda.Runtime.NODEJS_20_X, handler: 'handler', entry: path.join(__dirname, '../lambda/index.ts'), }); // Create the API Gateway const api = new apigateway.RestApi(this, 'VideoProcessingApi', { restApiName: 'Video Processing Service', description: 'This service handles video processing.', defaultMethodOptions: { authorizationType: apigateway.AuthorizationType.NONE, }, }); api.root.addMethod('POST', new apigateway.LambdaIntegration(videoProcessingLambda)); }}Every time we now run the following deployment command in our terminal, our changes are going to be deployed right to a publicly available API, authorized by our QStash webhook logic from before.
cdk deployYou may be prompted to confirm the necessary AWS permissions during this process, for example allowing APIGateway to invoke your lambda function.
Once your code has been deployed to Lambda, you'll receive a live URL to your endpoint via the CLI and can see the new APIGateway connection in your AWS dashboard:
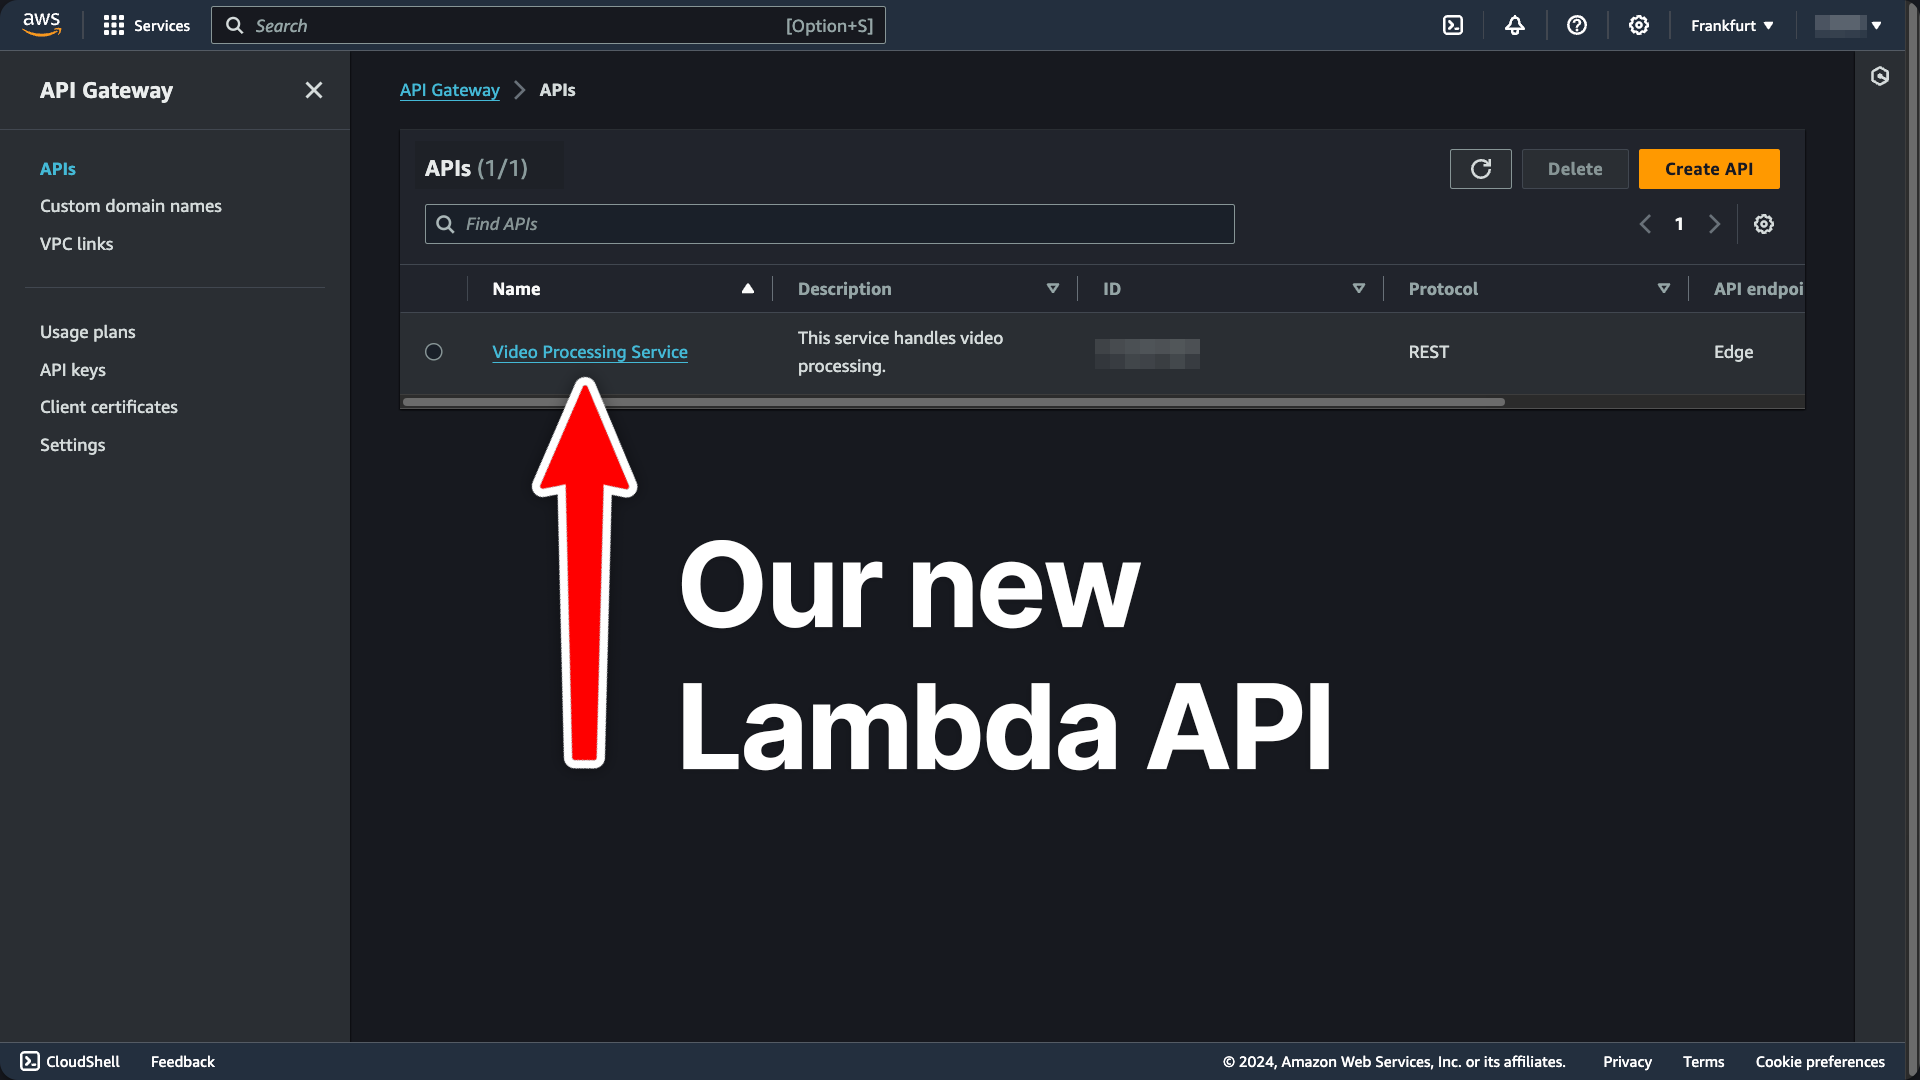
The URL you use to invoke your function typically follows this format, especially if you follow the same stack configuration as shown above:
https://<API-GATEWAY-ID>.execute-api.<API-REGION>.amazonaws.com/prod/
To provide our QSTASH_CURRENT_SIGNING_KEY and QSTASH_NEXT_SIGNING_KEY environment variables, navigate to your QStash dashboard:
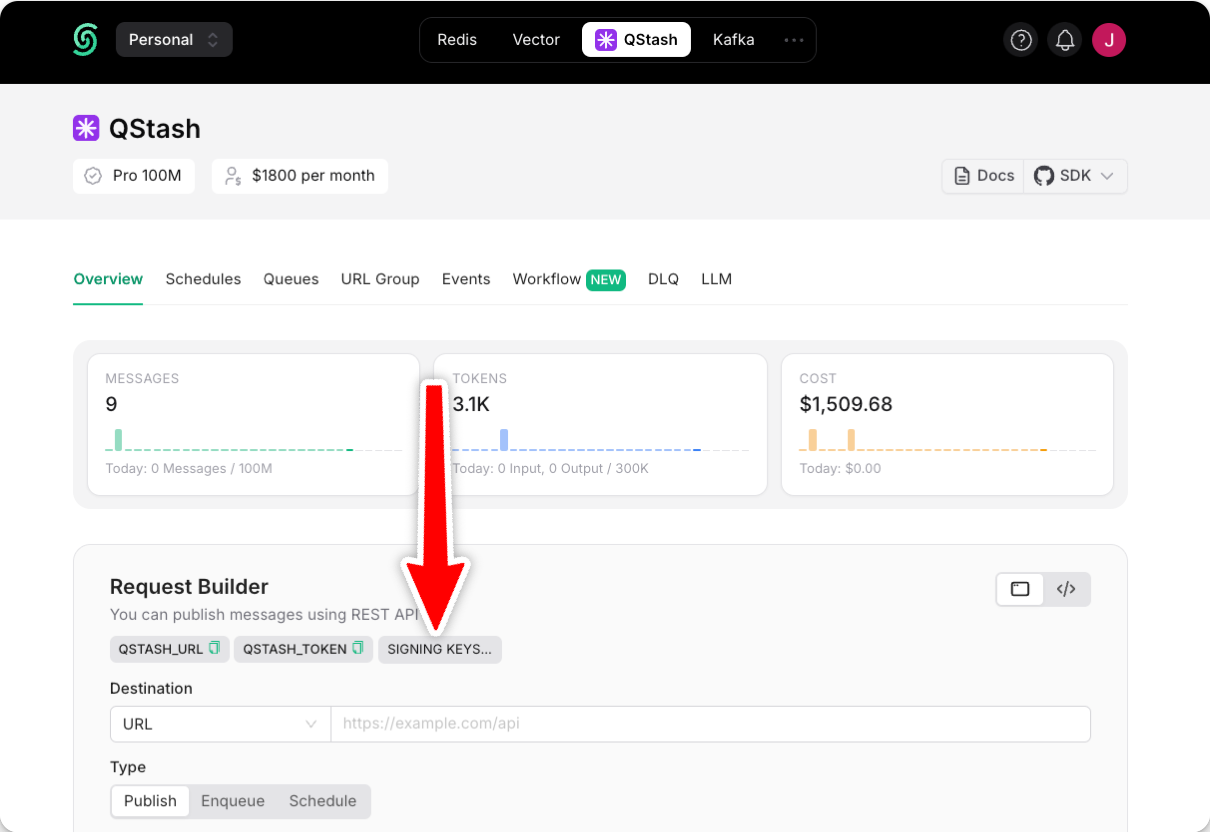
and make these two variables available to your Lambda in your function configuration:
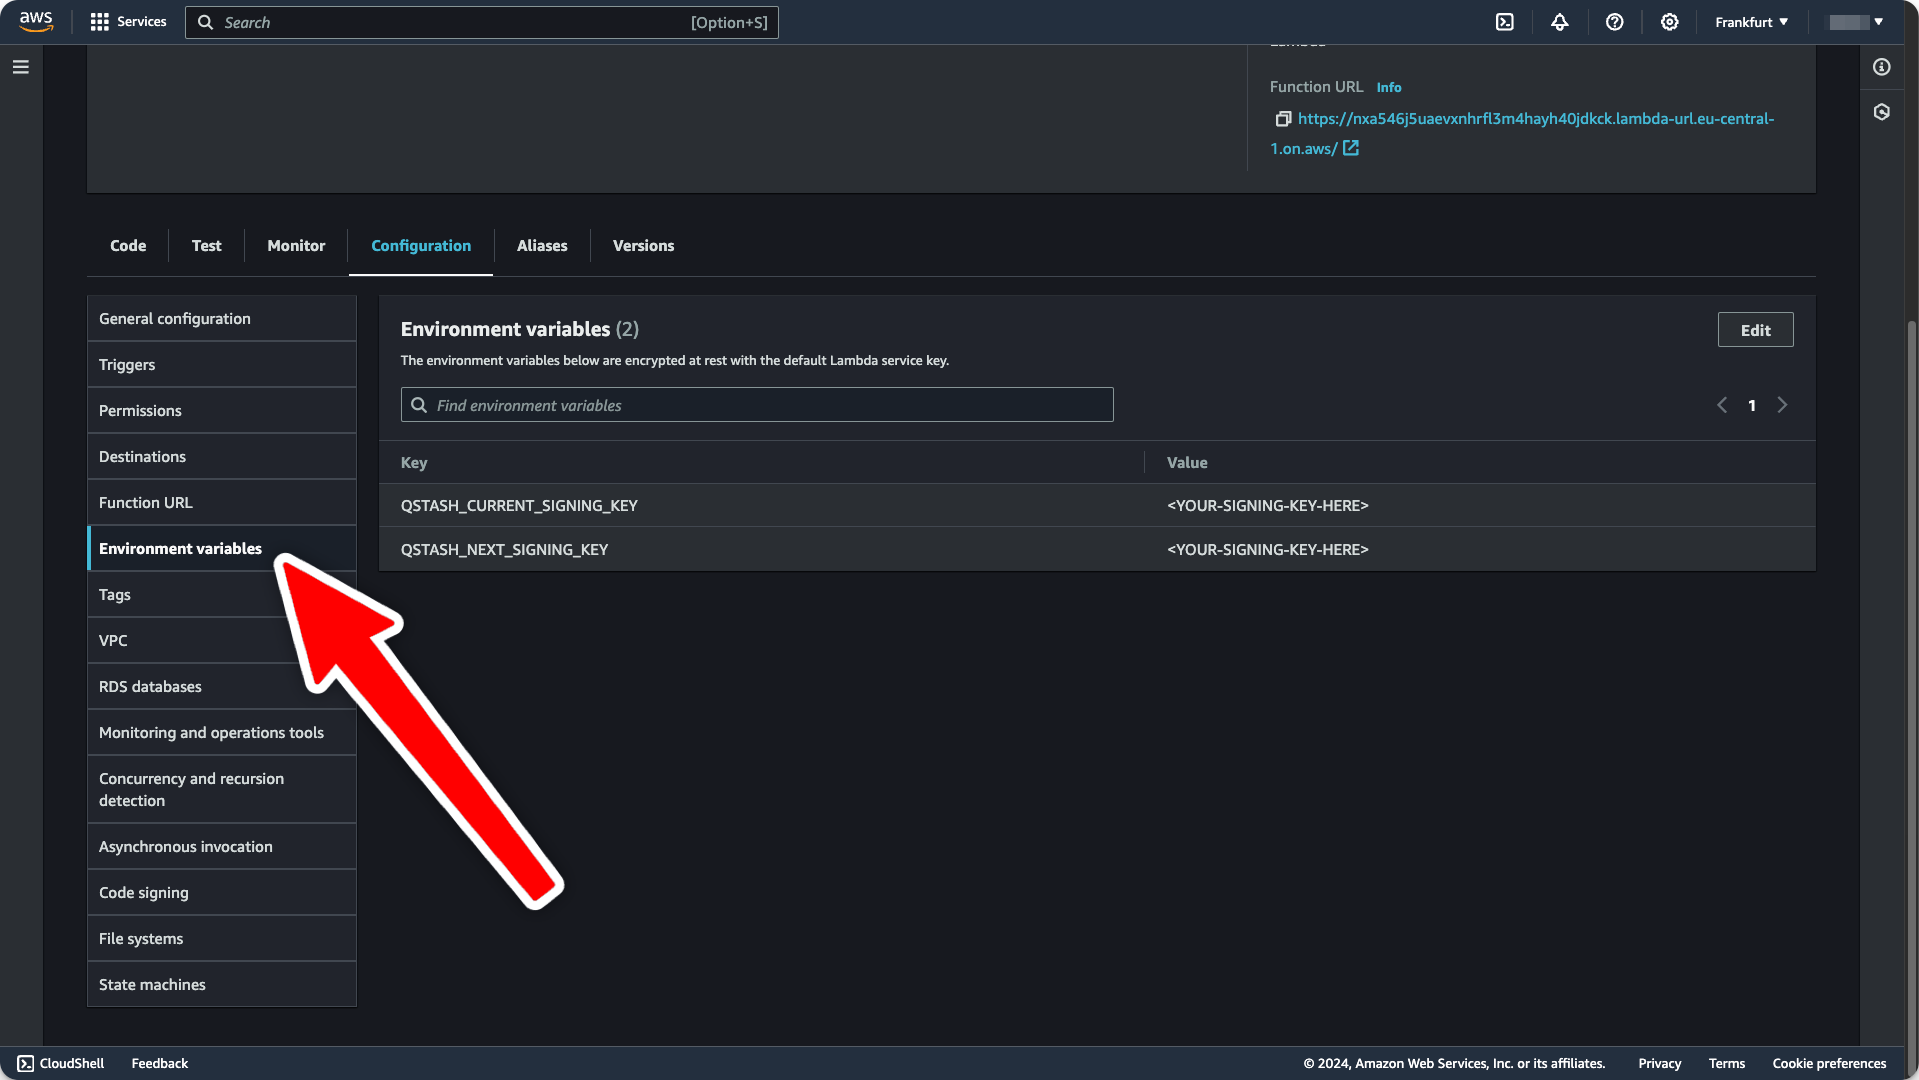
Tada, we just deployed a live Lambda with the AWS CDK! 🎉
Manual Deployment
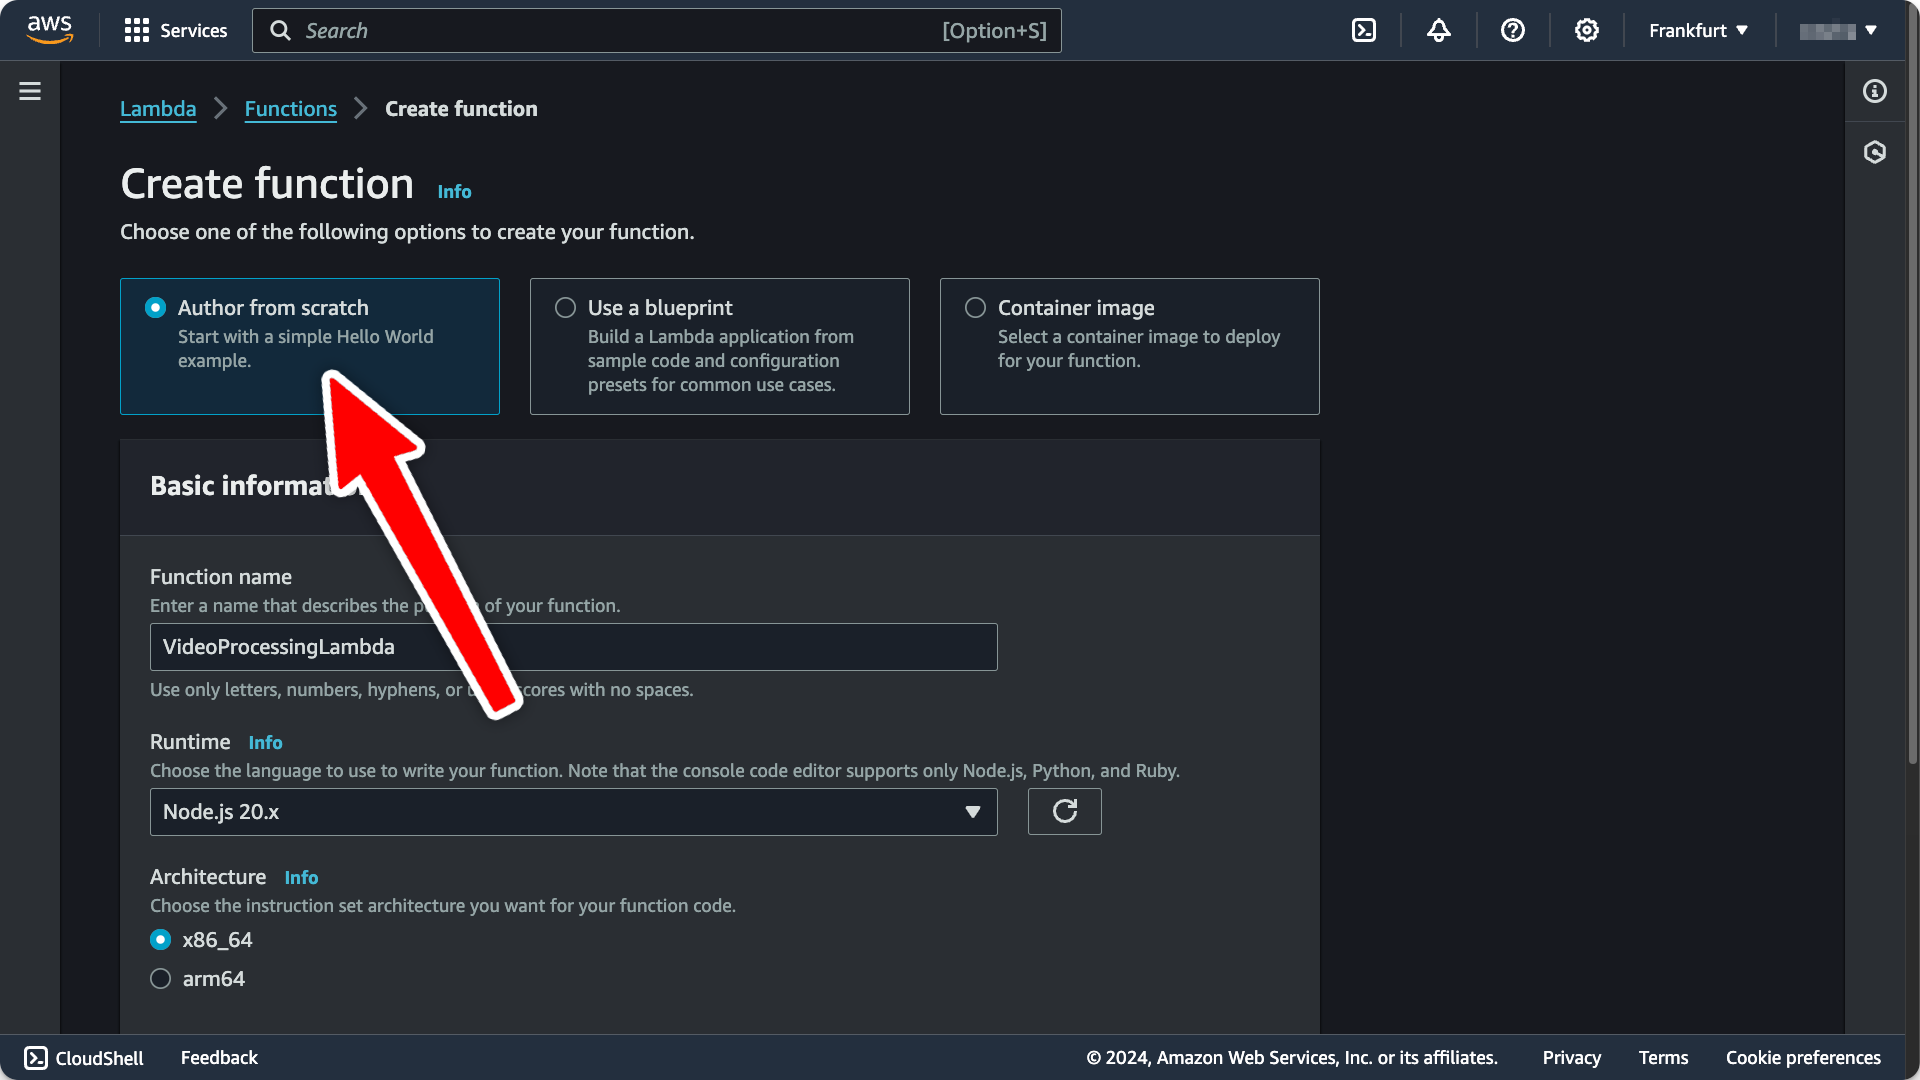
- Create a new Lambda function by going to the AWS dashboard for your desired lambda region. Give your new function a name and select
Node.js 20.xas runtime, then create the function.
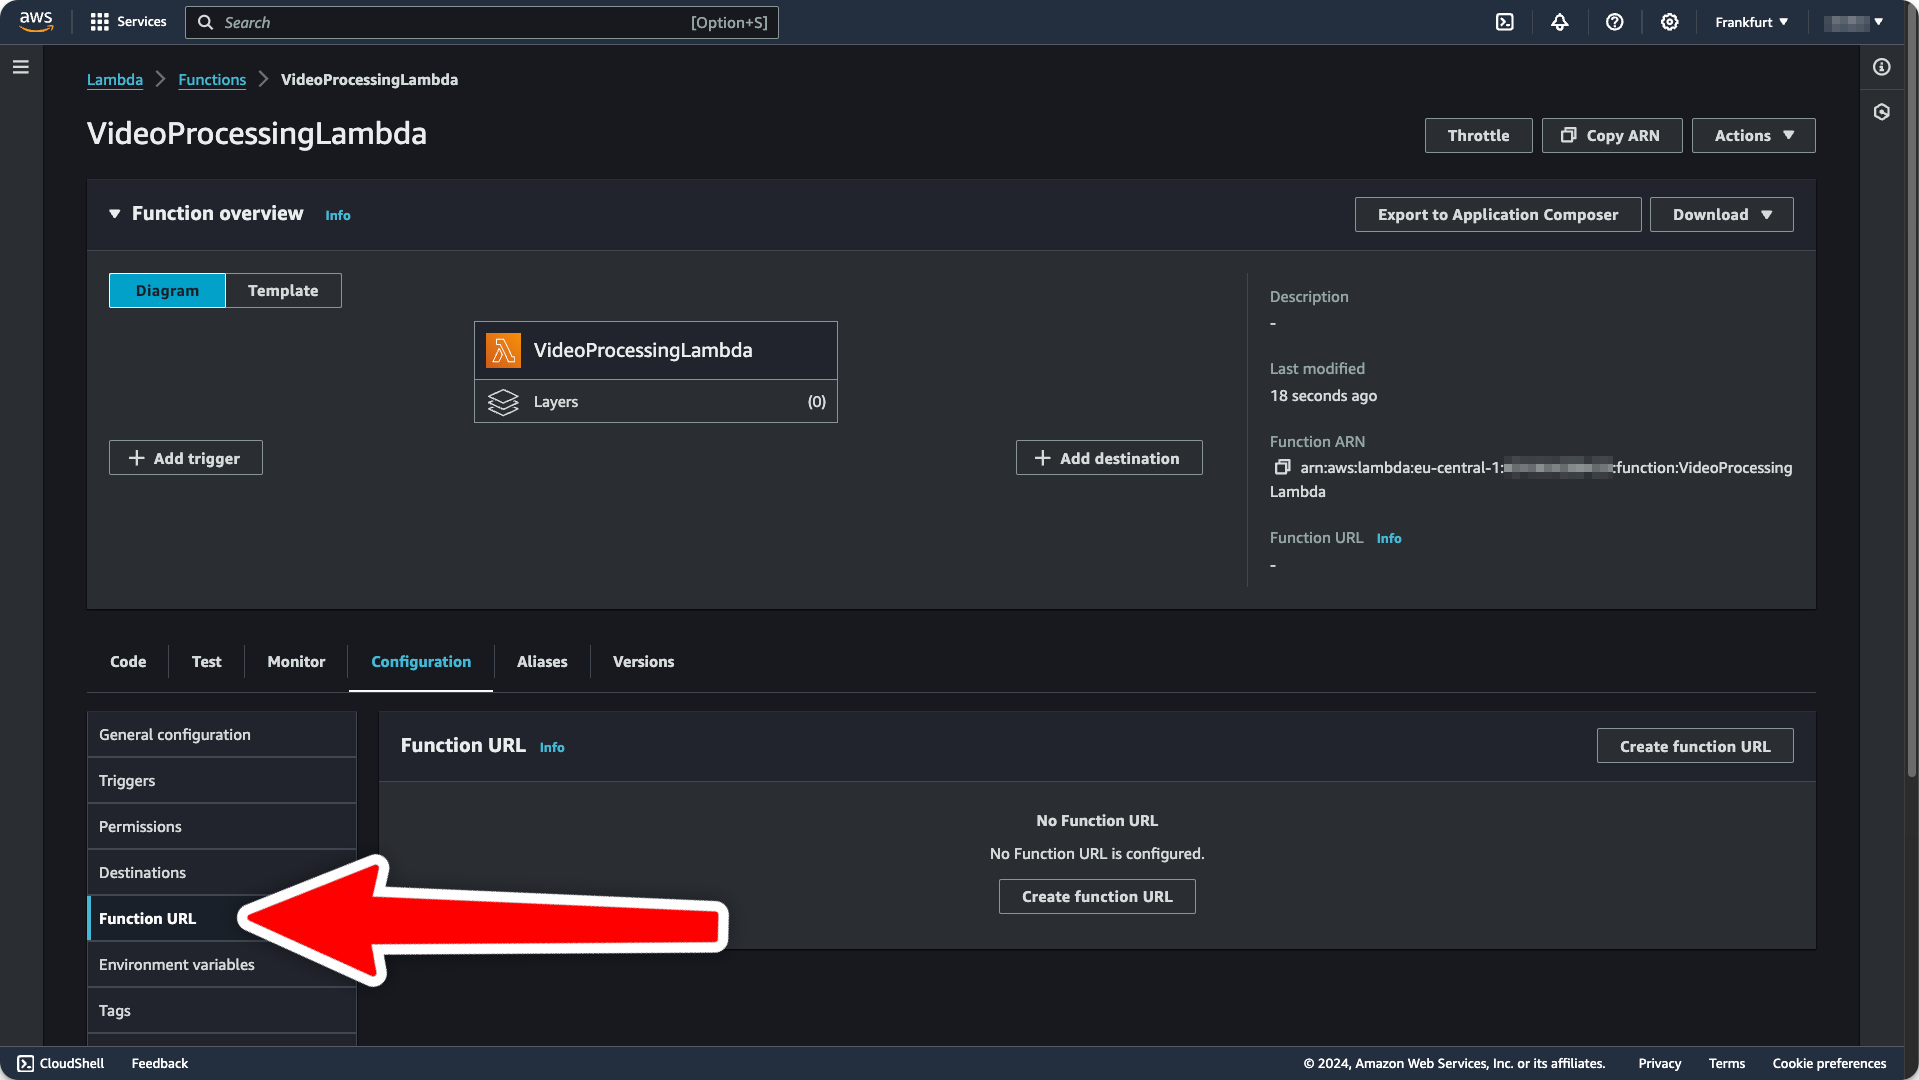
- To make this Lambda available under a public URL, navigate to the
Configurationtab and clickFunction URL:
-
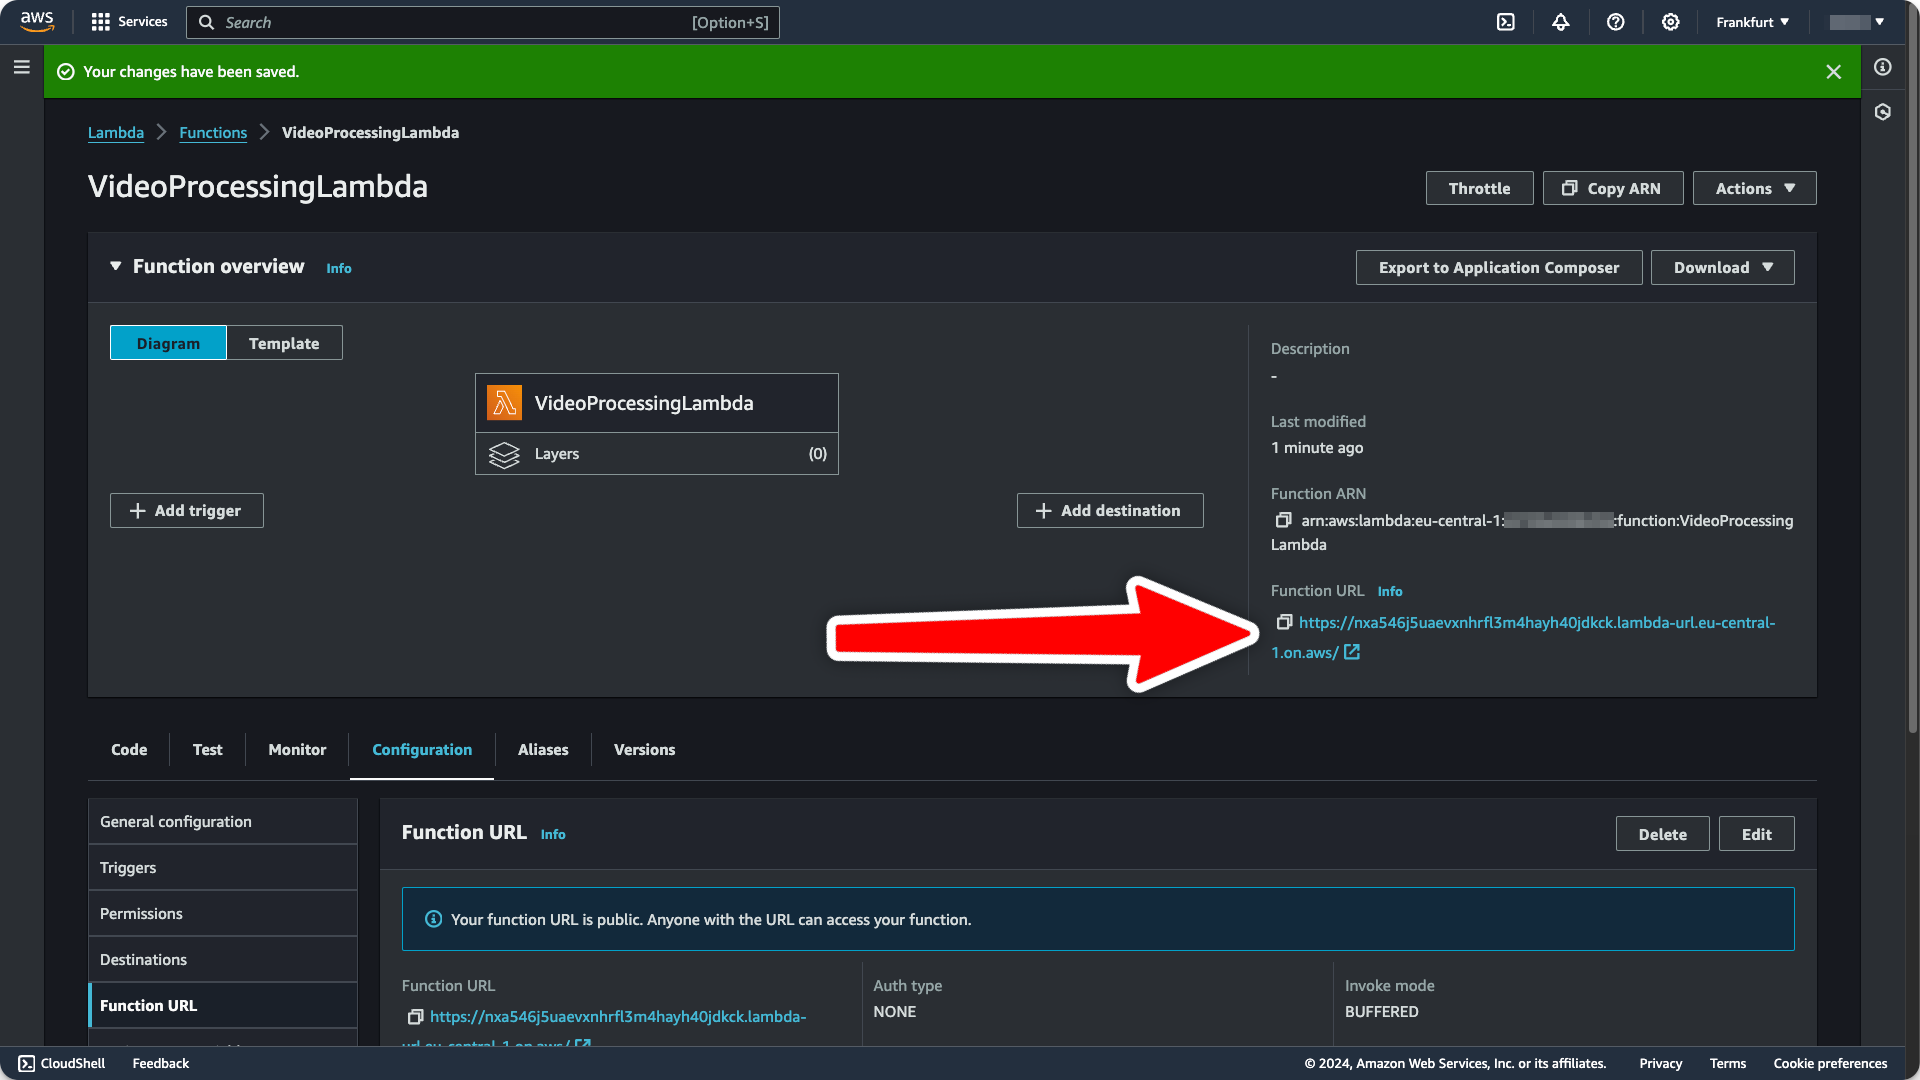
In the following dialog, you'll be asked to select one of two authentication types. Select
NONE, because we are handling authentication ourselves. Then, clickSave.You'll see the function URL on the right side of your function overview:
- Get your current and next signing key from the Upstash Console.
- Still under the
Configurationtab, set theQSTASH_CURRENT_SIGNING_KEYandQSTASH_NEXT_SIGNING_KEYenvironment variables:
- Add the following script to your
package.jsonfile to build and zip your code:
{ "scripts": { "build": "rm -rf ./dist; esbuild index.ts --bundle --minify --sourcemap --platform=node --target=es2020 --outfile=dist/index.js && cd dist && zip -r index.zip index.js*" }}- Click the
Upload frombutton for your Lambda and deploy the code to AWS. Select./dist/index.zipas the upload file.
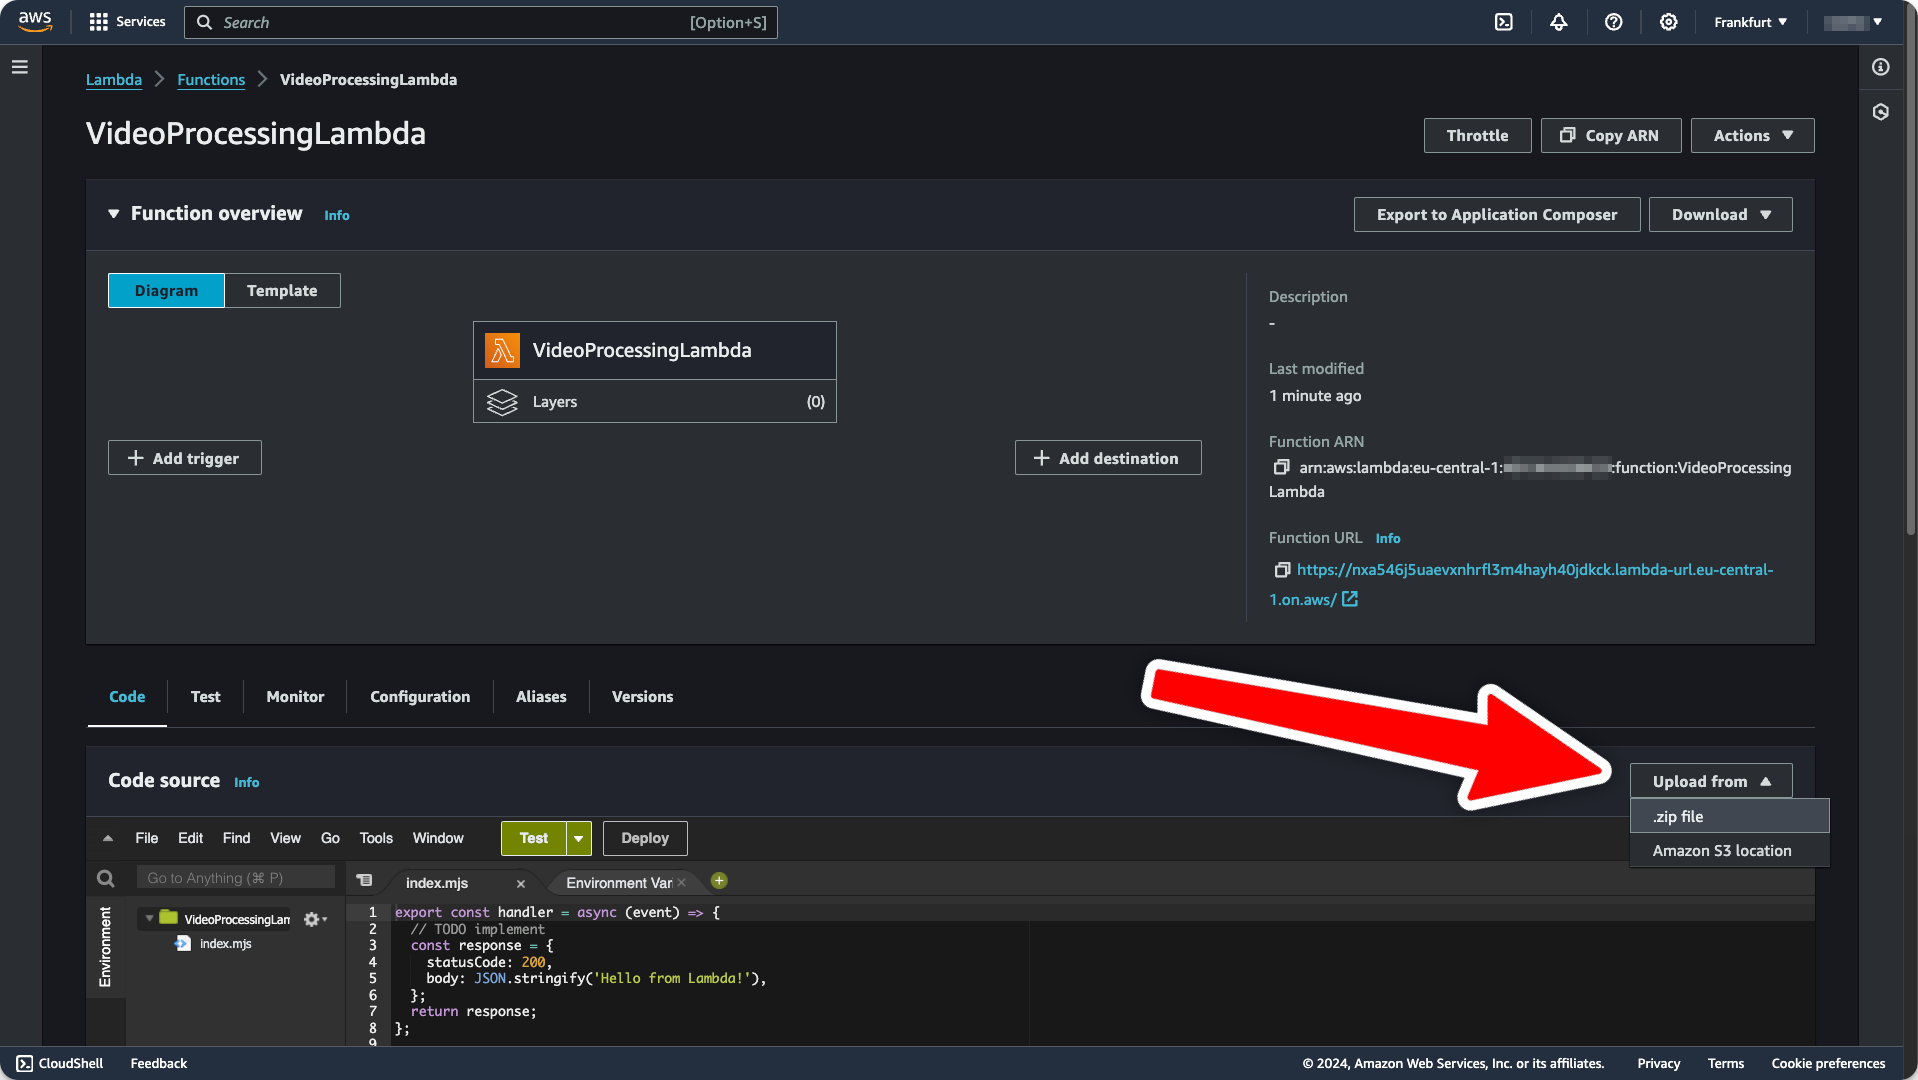
Tada, you've manually deployed a zip file to AWS Lambda! 🎉
Testing the Integration
To make sure everything works as expected, navigate to your QStash request builder and send a request to your freshly deployed Lambda function:
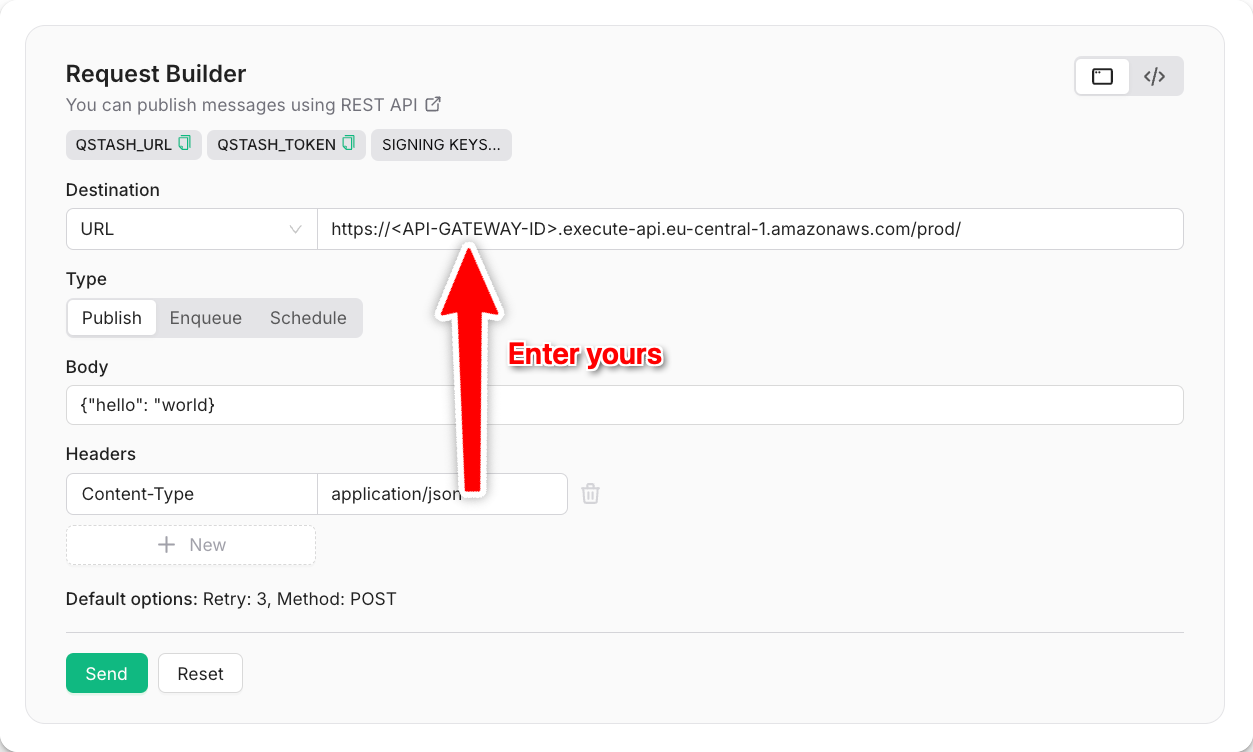
Alternatively, you can also send a request via CURL:
curl --request POST "https://qstash.upstash.io/v2/publish/<YOUR-LAMBDA-URL>" \-H "Authorization: Bearer <QSTASH_TOKEN>" \-H "Content-Type: application/json" \-d "{ \"hello\": \"world\"}"